Install PHPMyAdmin on Manjaro 16.10

This tutorial is going to show you how to install PHPMyAdmin on Manjaro 16.10. As you know, PHPMyAdmin is a web based administrative tool for MySQL Server. We can perform many administrative tasks to our MySQL Server right away from a web browser such as Google Chrome. In order to install PHPMyAdmin, first we need to install LAMP (Linux Apache MySQL and PHP) on our system. Please refers to my previous tutorial to install Apache, MySQL and PHP on Manjaro below.


Once we've configured LAMP on our system, now we are ready to install PHPMyAdmin. Please follow the steps below.
Step 1. Install PHPMyAdmin
You can either install it via Add/Remove Software (Pamac GUI) or via Terminal command.
sudo pacman -S phpmyadmin
Output:

sudo pacman -S phpmyadmin
[sudo] password for dhani:
resolving dependencies...
looking for conflicting packages...

Packages (1) phpmyadmin-4.6.6-1

Total Download Size:    6,08 MiB
Total Installed Size:  35,85 MiB

:: Proceed with installation? [Y/n]

Step 2. Configure PHPMyAdmin

Enable mysqli on PHP. On Terminal, do the following

sudo nano /etc/php/php.ini

Find and uncomment the line extension=mysqli.so. It should looks like this now:

extension=mysqli.so

Setup Apache by creating new configuration file

sudo nano /etc/httpd/conf/extra/phpmyadmin.conf

Now paste these lines:

Alias /phpmyadmin "/usr/share/webapps/phpMyAdmin"
<Directory "/usr/share/webapps/phpMyAdmin">
    DirectoryIndex index.php
    AllowOverride All
    Options FollowSymlinks
    Require all granted
</Directory>

Now include this line below inside  /etc/httpd/conf/httpd.conf. Put it at the bottom of that file.

Include conf/extra/phpmyadmin.conf

Now restart apache

sudo systemctl restart httpd

Step 3. Access PHPMyAdmin web interface

Open web browser and type http://localhost/phpmyadmin. You should see the welcome window with login screen on the web browser.

phpmyadmin on manjaro

Login with your MySQL credentials

phpmyadmin on manjaro 2

If you see the error as above, "The configuration file now needs a secret passphrase (blowfish_secret), do the following. You will need a strong password, use 32 length password. You can use password generator to generate the password. For example I use this password: Nj9pzCbF^ZGgVxgZ!4pp-%*x4<QDfVFB

Edit the file /etc/webapps/phpmyadmin/config.inc.php and add the password to this line. So the final line should looks like this. Put the password between (' ').

$cfg['blowfish_secret'] = 'Nj9pzCbF^ZGgVxgZ!4pp-%*x4<QDfVFB'; /* YOU MUST FILL IN THIS FOR COOKIE AUTH! */

Now refresh the browser and the error should now gone.

phpmyadmin on manjaro 3

Thank you for reading. Please share if you found this article useful. Cheers

How to backup local data to Amazon S3 Storage on Manjaro


I have an Amazon S3 Storage account and I want to integrate the storage with my local work. I am using Manjaro for my daily work and actually, I just want to backup my data into Amazon S3 Storage. Fortunately, there is Dragon Disk application that allows us to easily move or backup our local data to Amazon S3 storage. Dragon disk is available for free and can be installed on Manjaro with ease. See my previous tutorial to install Dragon Disk on Manjaro.

How to backup or sync data to Amazon S3 Storage

Step 1. Install Dragon Disk 

Step 2. Setting the Amazon account to Dragon Disk

First we need to create a new account on Dragon Disk. At this point, we must have a working Amazon S3 account that will be integrated to DD.

Step 3. Create Synchronization Job

Next we can start create a new Synchronization Job. This job requires source and destination to be set for sync purposes. 
We may also specify some other sync options. 

Step 4. Start Sync

To start the sync, simply go to Synchronization and click the sync job we created earlier.
Thank you for coming and share this if you think this article is helpful.

Install and use rsnapshot for data backup on Manjaro

There are various backup software available for Linux system. One of the most powerful backup software is rsnapshot. Rsnapshot is a filesystem backup utility based on rsync. Its a command line backup tool and there is no GUI for rsnapshot. Here I will show you how to perform backup on Manjaro using rsnapshot. For a complete information, please visit the official website of rsnapshot at: https://wiki.archlinux.org/index.php/Rsnapshot
First, we need to install rsnapshot. Open Terminal and type the following command:
sudo pacman -S rsnapshot
Output:
manjaro@manjaro ~]$ sudo pacman -S rsnapshot
resolving dependencies...
looking for conflicting packages...

Packages (2) perl-lchown-1.01-5  rsnapshot-1.4.2-2

Total Download Size:   0.08 MiB
Total Installed Size:  0.30 MiB

:: Proceed with installation? [Y/n] y
:: Retrieving packages...
 perl-lchown-1.01-5-x86_64                               8.4 KiB  0.00B/s 00:00 [##############################################] 100%
 rsnapshot-1.4.2-2-any                                  71.1 KiB  64.7K/s 00:01 [##############################################] 100%
(2/2) checking keys in keyring                                                  [##############################################] 100%
(2/2) checking package integrity                                                [##############################################] 100%
(2/2) loading package files                                                     [##############################################] 100%
(2/2) checking for file conflicts                                               [##############################################] 100%
(2/2) checking available disk space                                             [##############################################] 100%
:: Processing package changes...
(1/2) installing perl-lchown                                                    [##############################################] 100%
(2/2) installing rsnapshot                                                      [##############################################] 100%
:: Running post-transaction hooks...
(1/1) Arming ConditionNeedsUpdate...
Now we need to configure rsnapshot. Still in Terminal, edit the file /etc/rsnapshot.conf using your favorite text editor such as nano. 
sudo nano /etc/rsnapshot.conf
There are several items we need to configure. 

1. Snapshot location

Find the following line inside the conf file.
snapshot_root   /.snapshots/
Now change it to the new location if you want. All snapshot/backups will be saved on this directory. For example:
snapshot_root   /rsnapshot/backup/
Now we create the new directory for the snapshot
sudo mkdir -p /rsnapsot/backup

2. Backup Level/Interval configuration

Now we need to specify the interval of the backup. The backup can be configured to be executed in hourly, daily, weekly etc. Find the Backup Level/Interval Section as follow:

You may change the alpha, beta items to something else such as hourly, daily, weekly. But keep in mind, it must be in ascending order. For more info about retain backup, read it here: https://wiki.archlinux.org/index.php/Rsnapshot#Retain_Previous_Backups.

3. Backup Points

Now, we move to the last part. This section will configure what or which folders to backup using rsnapshot.
On this section we can add or remove backup points. By default, you can see that rsnapshot will backup your /home, /etc/ and /usr/local/ directories.You can either add or edit this entries. For example, I add other directories to be included.
Please keep in mind, that we must use Tab instead of Space to separate those entries above. Also, do not forget to add 'slash' ("/") to the end of each directory.
Rsnapshot also works for remote files as well. I will discuss more about how to backup remote files using rsnapshot next time. 
Now save and close the config file. At this point, we are ready to use rsnapshot. Lets test it first. Use configtest option to test our configuration file.
sudo rsnapshot configtest
It should returned Syntax OK if all the configuration are well.
[manjaro@manjaro ~]$ sudo rsnapshot configtest
Syntax OK
Now we can use this command to execute the actual backup
sudo rsnapshot alpha
For further and advanced use, we can create a crontab to run rsnapshot automatically on a specific time. Please stay tuned on this blog, I will demonstrate how to automate rsnapshot via crontab.

Virtualbox 5.1.16 is released, install it on Manjaro 17.0

The new version of Oracle Virtualbox 5.1.16 has been released a while a go. Here I will show you how to install this latest Virtualbox 5.1.16 on Manjaro 17.0. Virtualbox is a free virtualization software for Linux and Windows operating system. You can run multiple operating systems on a single host using Virtualbox. 

Virtualbox package is available via Manjaro repository. So, installing it wont be a problem. We can use either Pamac GUI and also Terminal console to install it. 

Option 1. Install via Pamac GUI

Open Pamac Software Manager and type "virtualbox" on the search box. You should see virtualbox package listed there. 
Right click on virtualbox and click Install. You will see the following window appear
Simply click OK and the press Commit button to confirm the installation. 

Option 2. Via Terminal command

Install virtualbox via command line is very straight forward. Use the following command to start install it.
sudo pacman -S virtualbox
Thank you for coming. Don't forget to share it.

Manjaro 17.0 KDE edition, beautiful and lightweight Linux for Desktop

Linux gives us so many options on which distribution we can choose for our desktop. Today, I want to share some information about the new version of Manjaro 17.0 KDE edition. Manjaro KDE brings many improvements and this version 17.0 is just awesome. It is very easy to use and also beautiful as always. 

The Desktop

Nice and simple KDE desktop. Manjaro 17.0 features KDE Plasma version 5.3.9 and Kernel version 4.9.13-1. This new configuration makes Manjaro works pretty smooth on an old hardware as well. 

KDE Menu

Notification Area

Software Center

Manjaro 17.0 brings Octopi 0.8.7-2 to handle the application and package installation. 

Dolphin File Manager 

Dolphin is updated to version 16.12.2.

System Settings

Get full access to the settings manager on Manjaro 17.0. 

Installed Applications

There are many applications installed by default. Firefox is the default web browser, and you also will have LibreOffice as the office application. 

Application Switcher

Switch between applications is a fun in Manjaro 17.0 KDE. 
Interested? You can download Manjaro 17.0 KDE ISO from this link.

Deepin 15.4, another beautiful Linux distribution

This time I am not going to discuss about Manjaro. I want to show some nice screenshots of the new version of Deepin 15.4, an Ubuntu based Linux distribution that stole public attention. Deepin 15.4 is developed by Chinese Linux Community which brings many native applications and Deepin Desktop Environment. Deepin 15.4 is very easy to use and its damn beautiful. 
There is also Deepin version of Manjaro but it seems still uses the older Deepin Desktop. So, I can't wait the upcoming Manjaro with the latest Deepin Desktop. Meanwhile, you may want to take a look at this wonderful Linux Distro. 

Deepin 15.4 Desktop

I made some changes such as change the wallpaper to something more eye catching :). Deepin Desktop works pretty well on a low end laptop such as Lenovo Ideapad 300 series. 

Application Launcher

Application Launcher in Deepin 15.4 has been redefined, better and more responsive than previous version. Its very smooth when using it. All installed applications are listed here. We can also change the layout of the applications to be grouped based on category.

Deepin Control Center

To access all settings in Deepin, use Control Center. It will display any settings such as network, appearance, account settings and many more. 

Deepin Store

Feel the new way to install software. Deepin Store gives us a better way to search and install software in Linux. 

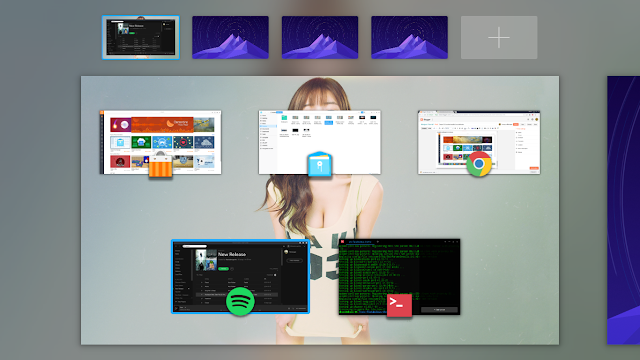
Multitasking View

Multitasking made easier in Deepin. With a stylish way to view and switch to another workspace. 

Application Switcher

Smooth animated application switcher made my day a lot fun. 
Want more? There are still a lot of fun offered by Deepin. Go download and install it on your computer. Its still in Beta edition but I have tested on my computer and it works. Its only took few minutes to install Deepin. Thank you for coming. Cheers.

Manjaro 17.0 Xfce Screenshots Tour

Just upgraded to the new Manjaro 17.0 Xfce editions. It looks awesome as always. Manjaro 17.0 brings many improvements and bug fixes. It uses Linux Kernel 4.9.13, which brings many new hardware drivers, bug fixes and performance improvements. 

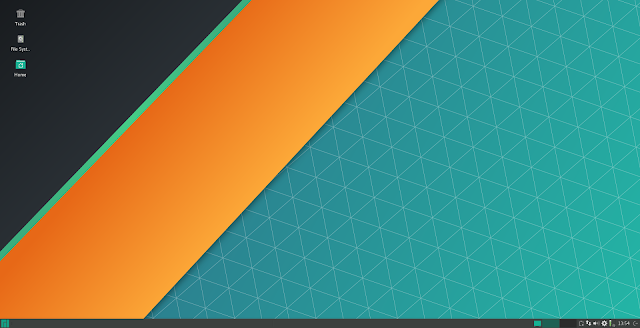
The Desktop

Application Menu

Thunar File Manager 1.16

App Center and Settings

Installed App


Thank you
Shell Script Tutorial for Beginner-Hello World

Shell Script Tutorial for Beginner-Hello World

Shell scripting is an effective way to manage our Linux server via Terminal command. Shell script can automate repetitive tasks easily. In this blog, I will try to write tutorials about Shell script. Shell script is very easy to learn. On this first post, lets start with Hello World script. 
Requirements
  • Linux OS (Manjaro or any other Linux variants)
  • Terminal console
  • Text editor such as nano or vim. But here I will use nano because I am not familiar with vim. You can also use Atom, a more powerful text editor for Linux. 

Hello World

Lets create our first program called hello-world.sh. Open Terminal and type the following line. 
nano hello-world.sh
The command above will create a new file called hello-world.sh using nano. Now, add the following lines to the new file:
#!/bin/bash
echo "Hello World"
exit 0
Now close the file using CTRL + X combination. 

Executing the Script

This new file is not executable yet. We need to make it executable with this command:
chmod +x hello-world.sh

Now, lets execute this script:
./hello-world.sh

Manjaro Deepin 16.10.3 Stable is now available with many bug fixes and security updates

For me, Manjaro Deepin is the best look Manjaro spin out there. The new stable version of Manjaro Deepin 16.10.3 is out few days ago. It comes with the beautiful Deepin Desktop version 15.3, the most beautiful Desktop Environment. Manjaro Deepin is a bit "heavier", need more graphic card performance to work well. It's not running well on Virtualbox but when its installed on a dedicated system, Manjaro Deepin will give you the best experiences in Linux. 

What's new in Manjaro Deepin 16.10.3 Stable

The following features are included in the new Manjaro Deepin:
  • Deepin Desktop v15.3
  • Kernel Linux 4.4.36 (LTS)
  • Manjaro-Welcome
  • Installer Calamares 2.4.5
  • optional Window managers Mutter/Gala or Metacity
  • Chromium
  • Evolution
  • Libreoffice-fresh 5.2.3
  • Xarchiver
  • Deepin-Movie plus VLC
  • Deepin-Game
  • Gimp 2.8.18
  • Evince
  • Galculator
  • Xfburn
  • Manjaro-Printer
  • Xsane
  • Pamac
  • Manjaro-Settings-Manager
  • Lightdm-Deepin-Greeter
  • Dconf-Editor
  • Gnome-System-Monitor
  • Gparted
  • Baobab
  • Isousb
  • Yaourt / Base-devel

Manjaro Deepin 16.10.3 Review

If you are new to Linux, Manjaro Deepin 16.10.3 is good for you. The XFCE edition will be much easier but this Deepin edition is also very easy to use. Its available in Live mode, so you can run it from USB flash disk without having to install it to your hard disk.

Download Manjaro Deepin 16.10.3 ISO